Virginia Advance Directive Form

Last updated September 29th, 2021

  1. Home »
  2. Power of Attorney »
  3. Virginia »
  4. Advance Directive

The Virginia advance directive is a health care document that enables a person to make certain medical decisions in preparation for a terminal illness or debilitating injury that renders them unable to communicate their wishes. This two-part form allows the principal (document creator) to name a health care representative to make decisions on their behalf, and to convey the types of medications, procedures, and life-sustaining treatments they wish to receive and reject.

Once an advance directive is signed by the principal and two (2) witnesses, it should be registered with the Virginia Department of Health (see instructions below) and copies of the document delivered to the appointed agent, the principal’s doctor, the principal’s family members.

Agent’s Duties§ 54.1-2986

LawsTitle 54.1, Chapter 29, Article 8

Signing Requirements
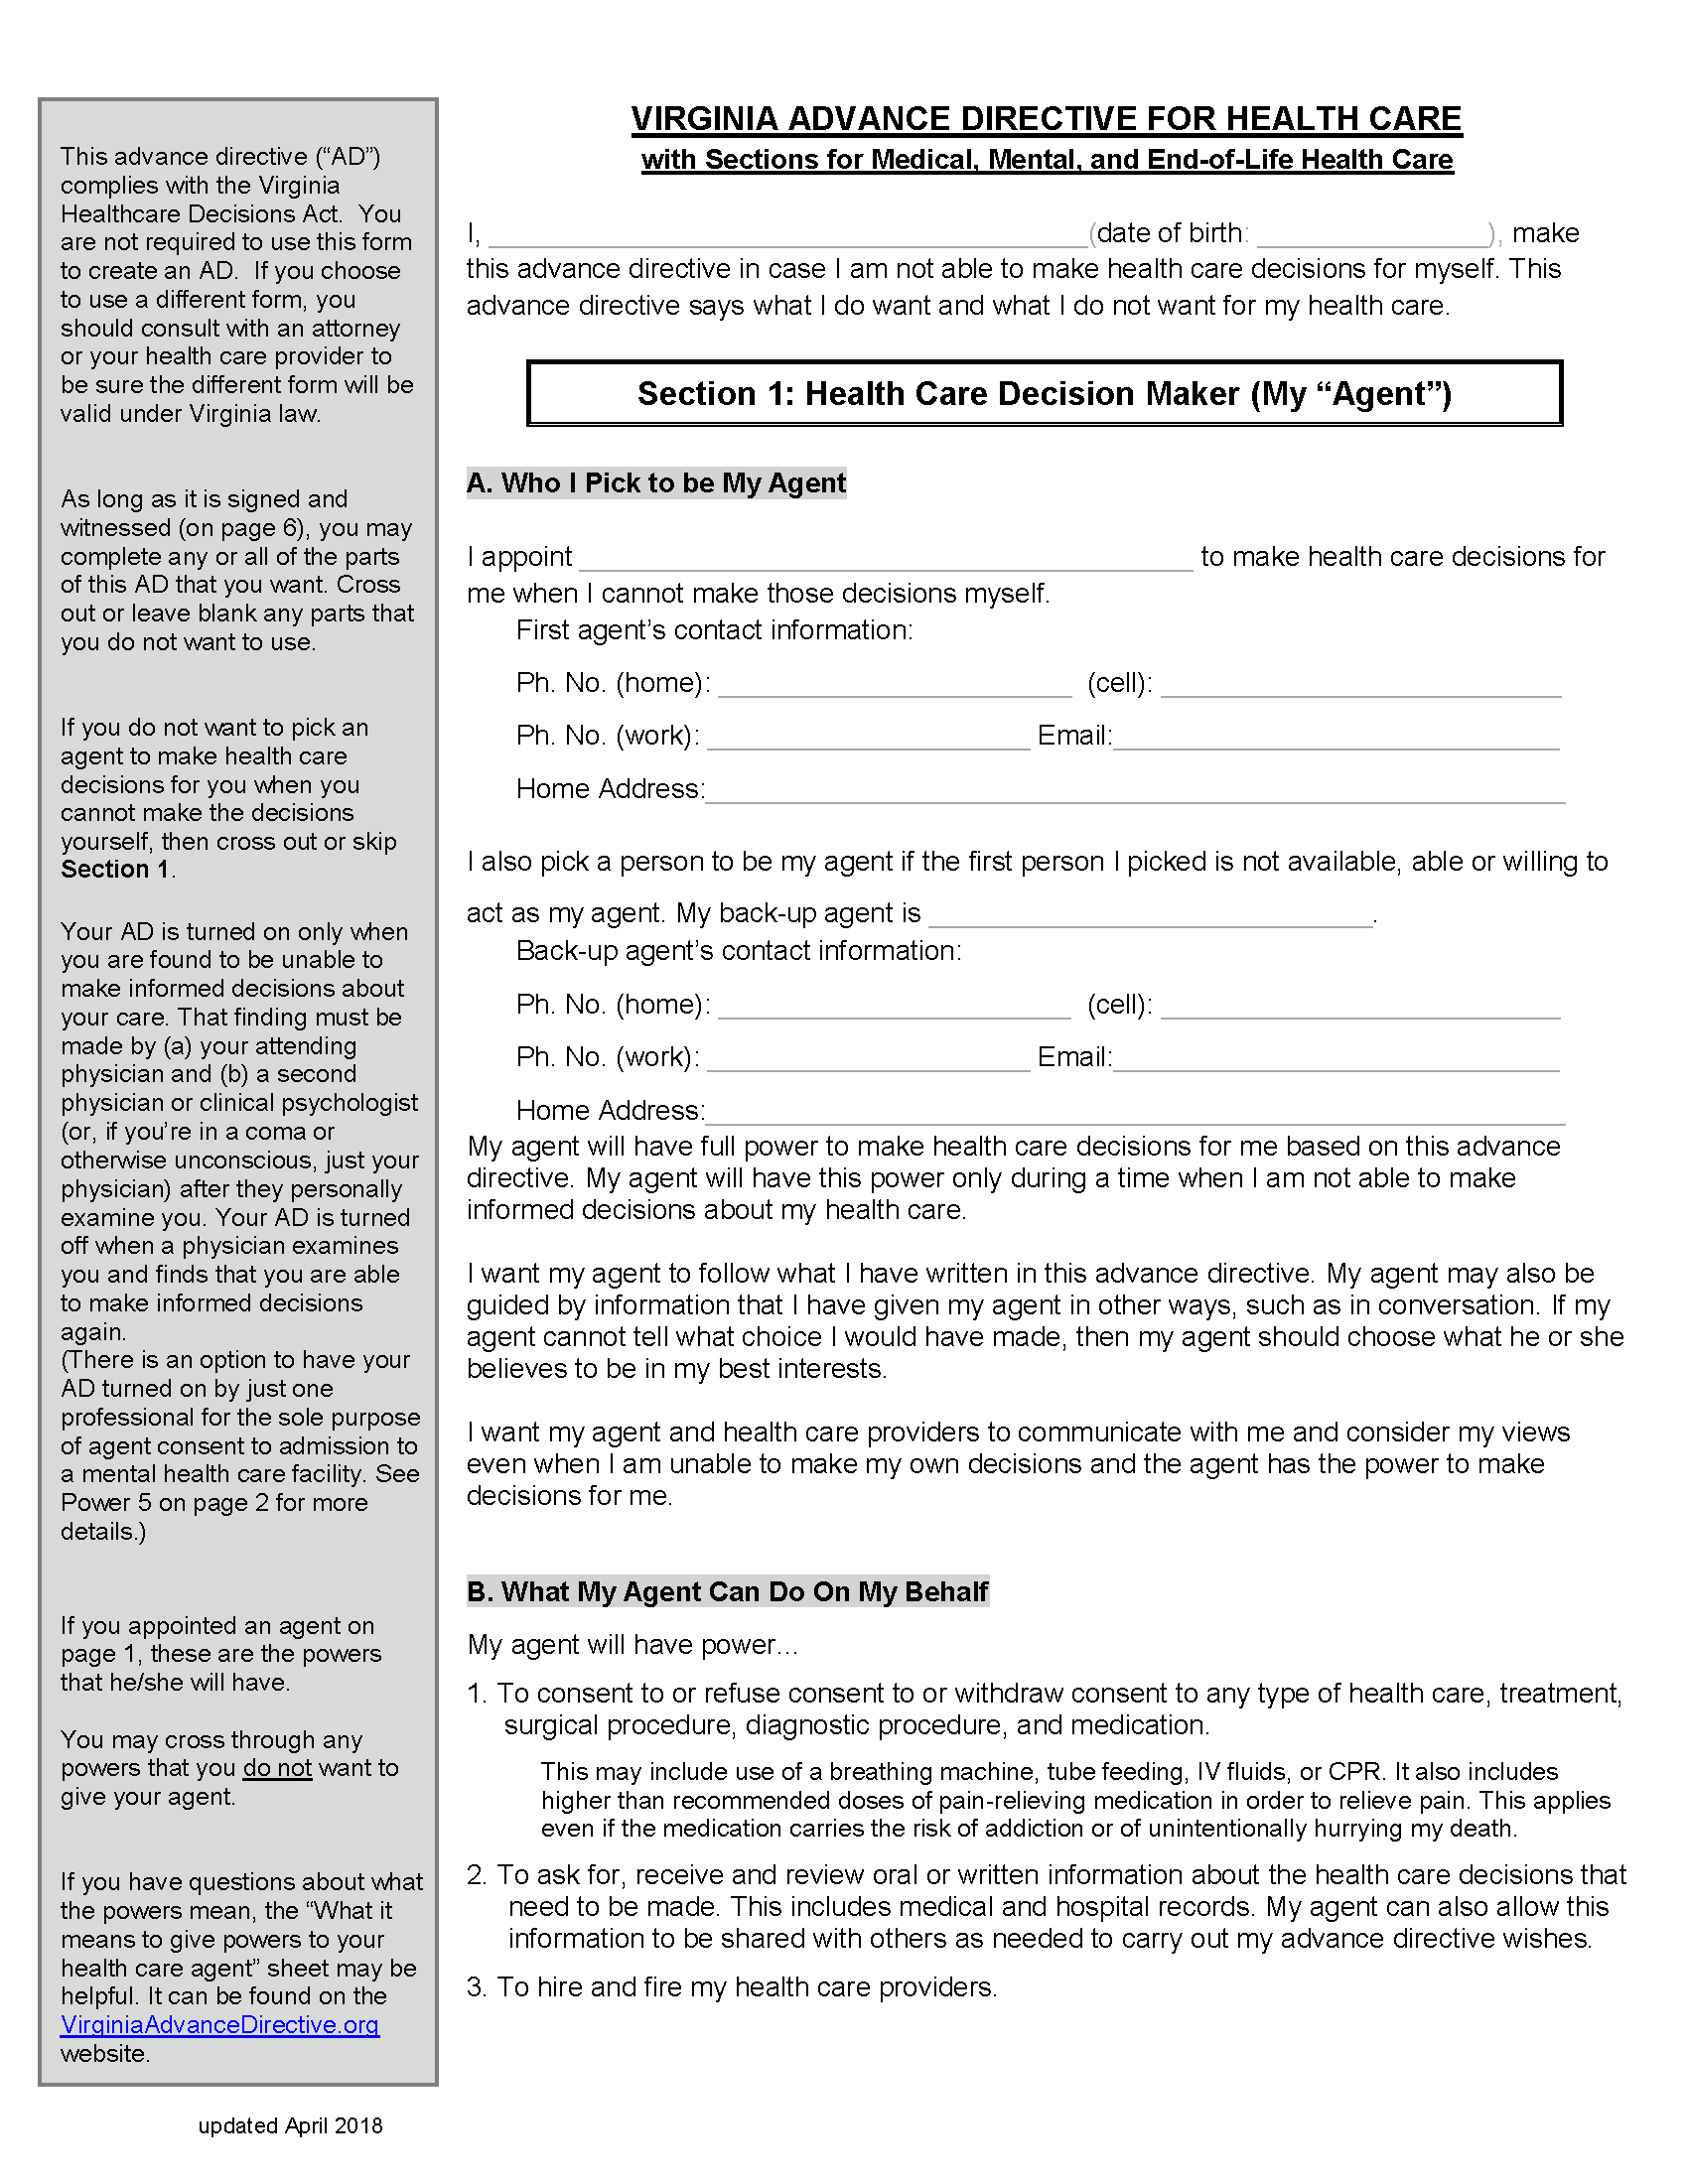
 (§ 54.1-2983) – Two (2) Witnesses

Statutory Form§ 54.1-2984


State Definition

Statute§ 54.1-2984

“Advance directive” means (i) a witnessed written document, voluntarily executed by the declarant in accordance with the requirements of § 54.1-2983 or (ii) a witnessed oral statement, made by the declarant subsequent to the time he is diagnosed as suffering from a terminal condition and in accordance with the provisions of § 54.1-2983.


Registration

LawsTitle 54.1, Chapter 29, Article 9

Although not legally required, it is recommended to register an Advance Directive form on the Advance Health Care Directive Registry maintained by the Department of Health.

Step 1 – Visit Registry Website

Go to www.connectvirginia.org/adr to access Virginia’s advance directive registry. Scroll down to the “Get Started” section and click the blue hyperlink (“HERE”) to create a new account.

Step 2 – Create Account

Users will have to fill in a number of empty fields with their personal information in order to create an account, including name, date of birth, address, and phone number. An account user name and password will also need to be set up. Click “Create Account.”

Step 3 – Upload Document

At this juncture, a user is able to upload their Advance Directive, in addition to a number of other health care documents, by clicking the “Choose File” button to the right of the form name. Next, click “Upload & Update Documents.”

Step 4 – Review Process

After an Advance Directive has been uploaded to the registry, it could take 24 hours for them to review and accept the document for accuracy and legitimacy. An email will be sent to the address that was provided while signing up for an account with information about the approval of any uploaded forms.