 Adobe PDF
 Microsoft Word
 OpenDocument

Document Features
- Rental Term – Specifies what time and date the guests can access the property and when they have to leave.
- Payment – Establishes the daily rental rate, cleaning fees, taxes, deposit amount, total amount owed, and acceptable payment methods.
- Rules – Defines the house rules, such as parking, maintenance, access, pets, and occupancy limit.
- Cancellation – Indicates that cancelling the agreement within 10 days of the move-in date results in forfeiture of the deposit.
Other Names
- Vacation Lease
- Guest Rental Agreement
- Summer Rental Agreement
11 Clauses to Include
1. Landlord & Tenant Identification
2. Occupancy Limits
3. Payment Terms & Deposits
4. Cancellation (Refund) Policy
5. House Rules
This depends on the landlord and the tenant’s expectations. Most rules for short-term tenants include the following:
- No parties or events – Landlords generally prohibit parties or events due to noise concerns and to keep friendly relations with neighbors.
- Smoking – Whether it is tobacco, marijuana, or vaping, landlords commonly prefer not to allow smoking on the property.
- Pets – Depends on the landlord. If a pet is allowed, a separate pet deposit is usually requested.
- Quiet times – Most landlords require “quiet times” to be respected for normal sleeping hours. This is normally from 10 PM to 7 AM.[2]
- Check-in/Check-out times – This should be outlined in the agreement. Airbnb has default times of 3 PM check-in and 11 AM check-out.[3]
- Property damage – Language states that the tenant’s deposit will be deducted if damage or repairs are needed after tenancy.
- Illegal activities – This ranges from drug activity to not starting a fire (BBQs) without a permit from the local fire dept.
6. Indemnification
A general statement that the tenant agrees to indemnify and hold harmless the landlord for any loss, claim, damage, injury, demand, or other liability regarding renting the property.
It is also common for landlords to have homeowner’s insurance for liability purposes (such as Farmer’s Landlord Insurance).
While having this language in an agreement may not prevent a landlord’s negligence, it helps the tenant acknowledge they are responsible for any wrongdoing.
7. Trash Removal
8. Landlord’s Access
9. Utilities
10. Contact Details
11. Disputes
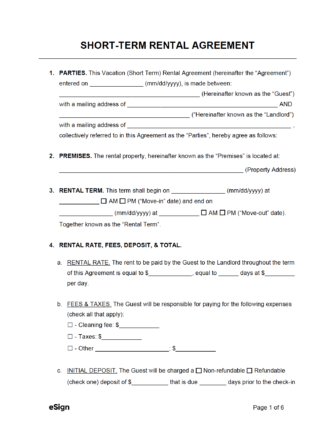
Sample
Download: PDF, MS Word, OpenDocument
SHORT-TERM RENTAL AGREEMENT
1. THE PARTIES. This Short-Term Rental Agreement (“Agreement”) is made on [DATE] by and between:
Landlord: [LANDLORD’S NAME] (“Landlord”)
Mailing Address: [MAILING ADDRESS]
E-Mail: [E-MAIL]
Phone: [PHONE]
Tenant: [TENANT’S NAME(S)] (“Tenant”)
Mailing Address: [MAILING ADDRESS]
E-Mail: [E-MAIL]
Phone: [PHONE]
For good and valuable consideration, the sufficiency of which is acknowledged, the parties hereby agree as follows:
2. PROPERTY. The rental property is located at the following street address: [MAILING ADDRESS] with the following details:
Bedroom(s): [#]
Bathroom(s): [#]
Addt’l. Description: [DESCRIBE]
Hereinafter known as the “Property.”
3. GUESTS. No more than [#] guests are allowed on the Property. The guest’s names are: (check one)
☐ – Mentioned. Guest’s name(s) are as follows: [LIST NAMES]
☐ – Not Mentioned.
The Tenant understands that they are solely liable for any actions, liabilities, or damage caused by a guest on the Property.
4. TERM. The Tenant is allowed to access and occupy the Property for the following term:
Check-In: [DATE] at [TIME]
Check-Out: [DATE] at [TIME]
5. PAYMENTS DUE. The Tenant understands and agrees to pay the following rent and deposit:
Rental Rate: $[AMOUNT] to be paid by [DATE].
Deposit: $[AMOUNT] to be paid by [DATE].
Other: [LIST OTHER FEES, TAXES, ECT.]
6. CANCELLATION POLICY. If, for any reason, the Tenant cancels this Agreement at the time or prior to check-in, the following shall apply: [DESCRIBE CANCELLATION POLICY]
7. UTILITIES. The Parties agree that all utilities, such as heat, air conditioning, electricity, water, sewer, internet, TV, and any other services, are the responsibility of: (check one)
☐ – Landlord – The Tenant agrees to be moderate and respectful of their use of utilities.
☐ – Tenant – The Tenant shall be billed either separately (after their stay) or from the payment of their deposit for their usage of utilities.
☐ – Other. [DESCRIBE]
8. RENTAL RULES. The Tenant agrees to abide by the following rental rules: [LIST RENTAL RULES]
9. INDEMNIFICATION. The Tenant agrees to indemnify and hold harmless the Landlord from all liabilities, losses, damages, and costs, including legal fees, resulting from any actions, incidents, or accidents occurring in or caused by the Tenant’s use of the Property.
10. DISPUTES. The Tenant agrees to indemnify and hold harmless the Landlord from all liabilities, losses, damages, and costs, including legal fees, resulting from any actions, incidents, or accidents occurring in or caused by the Tenant’s use of the property.
11. GOVERNING LAW. This Agreement is governed by and construed in accordance with the laws of located in the State where the Property is located.
12. ACCESS FOR MAINTENANCE. The Tenant agrees to allow the Landlord access to the Property for any standard or agreed-upon maintenance or common upkeep of the grounds. If access is needed, the Landlord agrees to give notice to the Tenant in accordance with State law.
By signing below, the Landlord and Tenant agree to all terms and conditions of this Agreement.
Landlord: ____________________________ Date: _____________
Print Name: ____________________________
Tenant: ____________________________ Date: _____________
Print Name: ____________________________
Tenant: ____________________________ Date: _____________
Print Name: ____________________________