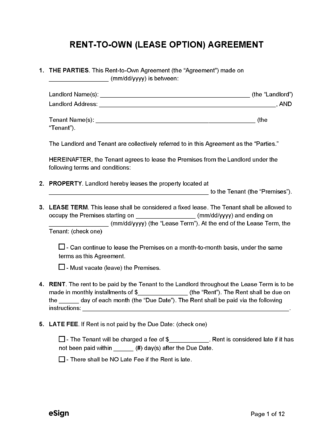
Rent-to-Own (Lease Option) Agreement

Rent-to-Own (Lease Option) Agreement

Last updated March 6th, 2023

  1. Home »
  2. Lease Agreements »
  3. Rent-to-Own

rent-to-own agreement is a contract that allows a homeowner to lease out their property as normal with the added condition that the tenant can purchase the property at the end of the set term. In other words, the form is essentially a residential lease agreement combined with a purchase agreement.

Also known as a:

  • “Lease with an option to purchase agreement”
  • “Lease-option”
  • “Lease-purchase”
  • “Lease-to-own”

By State


Contents


What is a Rent-to-Own Agreement?

Definition: A lease between a landlord and tenant that allows the option to purchase the leased property in accordance with the agreement.

A rent-to-own agreement is a form that combines leasing and selling into one. The landlord rents their property to a tenant, giving them the option to buy under pre-negotiated terms. This type of agreement is popular among renters that want to become homeowners but cannot due to inadequate savings or the inability to obtain a loan.

The owner will typically keep a portion of the monthly rent (known as the “rent premium”) and deposit it into an escrow account, where the buyer may also make contributions towards a down payment. The buyer may also be required to make a deposit upfront, known as an “option fee.” This is usually equivalent to one to five percent (1-5%) of the total purchase price. The period in which the buyer can decide to purchase is known as the “option term” and is negotiated by the parties ahead of time. If the buyer decides not to purchase within the option term, their accumulated rent premium and option fee are retained by the homeowner.

Due to the additional costs involved, a rent-to-own agreement only makes sense financially if the renters do intend on purchasing the property.


Rent-to-Own Pros & Cons

A rent-to-own agreement can serve as a great middle point between selling and renting a home. However, like all real estate endeavors, they come with some benefits and risks that should be understood prior to entering into the contract.

Seller – Pros & Cons

(PRO) Higher sale price – Because of the benefits provided to tenants through the use of a rent-to-own, sellers often negotiate higher rent payments than if the property were only a rental.

(PRO) Easier to find a buyer – If a property has been sitting on the market for months with no activity, selling it as a lease-purchase opens up the pool of potential buyers to those who wouldn’t be able to qualify for a loan or afford a down payment.

(PRO) Trustworthy renter – Renters in a lease-to-own anticipate purchasing the property at the end of the lease. Because of this, they often treat the rental as if it were their own.

(PRO) Income – Although the seller won’t be receiving a lump sum of money from selling the home, they can use the rental income to build up the required income for a down payment on another property.


(CON) Tenants with poor credit – Due to lease-option properties being more affordable/preferable to those without strong credit, sellers should be prepared to lease to tenants in tougher financial situations.

(CON) Property appreciation – In a lease to own, the parties lock in a future selling price for the home. If the home appreciates faster than expected, the buyer receives a “deal” while the seller misses out.

(CON) Difficult to make a home purchase – By leasing the property instead of selling it, the seller won’t have the cash they would likely need to purchase another home. This point doesn’t apply to those who are affluent and/or own more than one (1) property.

(CON) Uncertainty – Sellers can’t rely on the tenant to purchase at the end of the lease (unless they decide to use a lease-purchase agreement – see definition below).


Buyer – Pros & Cons

(PRO) Secure a price – During negotiation, the buyer and seller will agree on a price point for the home. If the buyer locks in a good rate, they can end up buying the property below market value.

(PRO) Helps build credit – Renters that can’t qualify for a loan due to poor credit can use a lease-to-own to build their credit until it’s time to purchase.

(PRO) Allows buyers to test the property/location – If the buyers aren’t 100% sure if the location/home is right for them, but they want to take a step towards purchasing, they can “test” to see if the spot is right for them.


(CON) Property depreciation – During the course of the lease, the property’s value could fall. Because the purchase price has already been locked in, the renter can buy at the inflated price or walk away and forfeit the option money accumulated.

(CON) Lost option fee & rent premium – If the tenant decides to walk away from purchasing, the portion of rent that has gone towards a down payment (rent premium) and the option fee is kept by the owner. This can amount to thousands of dollars of lost money.

(CON) Utility/repair costs – Because the responsibilities for taking care of the property are typically on the tenant, leasing-to-own can be significantly costlier than just renting.

(CON) Dependent on the owner – If the owner has a mortgage on the property and they stop making payments, they could lose the property. The same applies to property taxes.


Lease-Option vs. Lease-Purchase

While very similar in concept, a “lease option” and a “lease purchase” are both types of rent-to-own contracts that differ in one important factor: the tenant’s obligation. A lease option provides tenants with the option to purchase the residential property at the end of the lease, whereas a lease-purchase binds the tenant to purchase the property for a predetermined price. In other words, a lease-option allows a renter (buyer) to back out of the purchase at the end of the lease if they so choose, at the sacrifice of their option fee.

A lease option is the more commonly-used document due to the flexibility it provides the tenant/buyer.


How a Rent-to-Own Works

Step 1 – List the Property

To get the most exposure for their property, homeowners should consider listing the home on an online platform such as HousingList or Foreclosure.com.

Step 2 – Negotiate

Once a prospective renter has been found, the parties will need to negotiate the terms of the contract. This should be broken down into two (2) areas: information on the lease and the purchase contract.

Leasing

For the lease section of the agreement, the parties will need to agree on the monthly rent, the duration (length) of the lease, what utilities and services will be paid by the landlord (seller) and tenant(s), and the cost of the security deposit (if required).

Purchasing

The sections regarding the purchase will also need to be negotiated, including the purchase price of the home, what downpayment will be required, the option fee (has to be paid upfront), the term of the option (how long the tenant/buyer can decide to purchase), and what premium will be removed from the rent payments (if any).

Step 3 – Screen the Tenant

If the parties agree to the conditions, the property seller should take the time to vet the buyer/tenant thoroughly. The seller should screen through the applicant’s criminal, credit, and rental history. Additionally, the seller should verify the applicant’s income to ensure they can make rent payments. Although a lower-than-desirable credit score may be expected, the seller should see that the applicant doesn’t:

  • Have a series of previous evictions.
  • Have severe or recent criminal convictions.
  • Shy away from providing additional information.
  • Have one (1) or more poor landlord references.
  • Have inadequate income to cover rent.

Sellers can use the following resources for obtaining a background check on an applicant:

To verify an applicant’s income, the seller should request recent bank statements (previous 2-3 months), tax returns, payment records (paystub), and verification from their employer (job role, full-time/part-time, name and contact info of manager, etc.).

Above all, the landlord should take the time to interview the tenant to give them a chance to explain any red flags on their application.

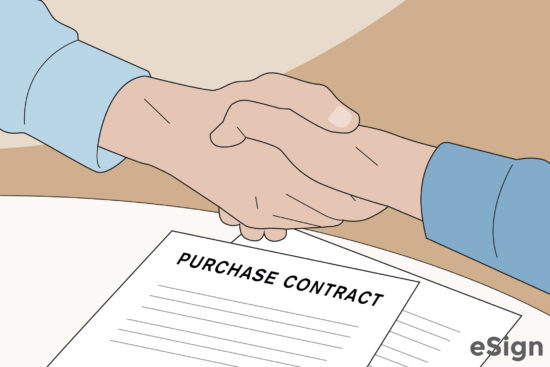
Step 4 – Sign the Lease Option

As long as the parties agree to everything included in the contract and the landlord approves of the tenant’s application, they can sign the agreement. Signatures can be provided electronically with eSign or by printing out the agreement and signing it by hand. After this point, the tenant(s) will lease the property “as normal” until they decide to activate their option to purchase (if desired). If the tenant(s) wish to go ahead with purchasing the home, proceed to the fifth step. Otherwise, the contract will continue as a lease until its termination.

Step 5 – Enter Into the Purchase Agreement

If the tenant/buyer(s) intend to purchase the property (known as “exercising their option”), they will need to give the owner a notice of their intent to purchase. Once received, the parties will need to enter into a purchase agreement. This process will be very similar to a standard property sale, with the major differences being that the tenant will have already paid an option fee that will be applied towards the home, they will have accumulated an additional sum from the additional rent premiums they made (if applicable), and the purchase price will have been predetermined.

In order to ensure the closing process goes smoothly, the buyer and seller should 1) request a survey of the home to ensure they understand the full extent of the property’s condition, 2) schedule an inspection to locate any potential issues with the property, 3) set a closing date, 4) discuss how the property will be paid for (next step), and 5) negotiate any selling conditions.

Step 6 – Disclosures + Financing

Depending on the state in which the property is located, they will need to give the buyer disclosures regarding the property. This includes informing the buyer of any issues with the property that may require repair or renovation. Because the buyer will have been living in the property prior to the purchase, they will find the majority of faults on their own. Regardless of the state, all sellers are required by Federal law to provide the buyer with a lead disclosure if the property was built prior to 1978.

Because the buyer will most likely be taking out a mortgage on the property, they will need to have the home appraised. This is paid for by the buyer but is requested by the financer to ensure they can pay off the mortgage by selling the home in the event of a foreclosure.

Step 7 – Closing

At the last stage of the process, the buyer and seller will conduct a final walkthrough of the home, the buyer will transfer the funds to the seller (commonly through a wire), any closing costs will be paid, and the seller will sign the deed over to the buyer. The deed should only be signed after the buyer has proved the funds are available.


What to Include

Although rent-to-own agreements can be customized to meet the unique needs of a situation, they should cover the following points, at a minimum:

  • Duration (rent term) – The length of the lease contract. Typically one (1) to three (3) years.
  • Option term – The window of time in which the tenant/buyer can decide to purchase the leased property. The option term is typically the length of the lease, although a different timeline can be specified in the contract.
  • Parties – Names and addresses of the buyer(s) and the seller.
  • Security deposit – Will typically be equivalent to one (1) or two (2) months’ rent.
  • Premises – The full address of the home/property to be leased.
  • Rent payments – Should be the same rate that would be charged if the home wasn’t a lease-to-own.
  • Purchase price – The dollar ($) amount of what the tenant will pay in the event they decide to purchase.
  • Premium credit – The amount of each monthly payment that will serve as a credit to the purchase price. Forfeited if the buyer doesn’t exercise the purchase option.

Sample

Download: PDF, Word (.docx), OpenDocument


How to Write

Download: PDF, Word (.docx), OpenDocument

Step 1 – The Parties

Enter the date that the contract is being completed (today’s date), followed by the name and address of the landlord/seller and the name of the tenant/buyer.

Step 2 – Property

Enter the full address of the rental home, including the street address, city/town, state, and ZIP code.

Step 3 – Term

The contract term is the length of time the tenant can rightfully live in the rental (regardless of their decision to purchase). Enter the number (#) of months the lease will last, followed by the start and end dates.

Step 4 – Rent

The rent payments are separate from the purchase price and are what the tenant is required to pay monthly in order to live in the property. Enter:

  • The dollar amount ($) the tenant has to pay per month;
  • The date the first rental payment is due; and
  • The day of the month in which each rental payment should be made.

Step 5 – Rent Premium

The rent premium is a portion of the monthly rent (if any) that accrues throughout the lease term. If the tenant/buyer decides to purchase the property, the rent premium is credited towards the purchase price or a down payment on the home. Enter the portion of the rent that acts as the premium in the space provided.

Note: This is not an additional amount – the rent entered in Step 4 should include the premium.

Step 6 – Utilities

Lease-to-own agreements typically require tenants to pay for all utilities and maintenance/repairs on the property. If the landlord will be covering any of these things, enter them on the two (2) lines provided.

Step 7 – Security Deposit

If the landlord/seller will require the tenant/buyer to pay a security deposit for the rental, specify the amount ($) in the first available space. Then, enter the number (#) of days the landlord has to return the deposit (consult state-specific security deposit laws).

Step 8 – Occupants

If there will be additional occupants in the dwelling aside from the tenant/buyer, check the first box and enter the names of all other occupants. Otherwise, check the second box and proceed to the next step.

Step 9 – Notices

Specify the addresses where the landlord/seller and tenant/buyer should send any notices to each other. The addresses listed must be correct, as the tenant/buyer will send a notice to the written address for exercising their option to purchase in the event they decide to buy the home.

Step 10 – Pets

If the tenant is not allowed to have pets on the property, check the first box. If they are allowed to have one (1) or more pets, check the second box and specify the number (#) of pets and the exact types of pets allowed (e.g., dogs under 50lbs, cats, fish, hamsters, etc.).

Step 11 – Smoking

Check one of the boxes to indicate whether or not the seller will permit the tenant to smoke on or in the property.

Step 12 – Lead-Based Paint

If the home was built prior to 1978, check the second box and ensure the tenant receives the appropriate lead disclosure forms. If the property was built after 1978, check the first box.

Step 13 – Option Term

The option term is the length of time in which the tenant/buyer can decide to purchase the rented home. This is typically the same duration as the lease, although the seller can make the option term any amount of time they see fit. Specify the start and end dates of the term (day, month, and year).

Step 14 – Option Fee

The option fee is what the buyer pays to the seller in exchange for having the right to purchase the rental. The value of the option fee is applied to the purchase price if the tenants go forward with the purchase. The option fee is nonrefundable and kept by the landlord/seller if the tenant decides not to purchase.

Step 15 – Purchase Price

The purchase price of the property should be carefully determined, as the seller will be obligated to sell the property for this amount if the buyer decides to exercise the option. If set too low, appreciation can result in the seller losing money.

Step 16 – Included in Purchase

If there are any additional possessions the owner will be including in the purchase price, enter them on the three (3) lines provided. If none, leave the field blank.

Step 17 – Governing Law

Enter the name of the state in which the property is located.

Step 18 – Signatures

As long as the parties agree to everything included in the contract, they can record their signatures on the form. This can be done with eSign or by printing the form out and signing it by hand. Leave any fields that don’t apply blank.