Also known as a:
- Power of Attorney for Healthcare
- Health Care Power of Attorney (HCPA)
- Health Care Proxy
By State
- Alabama
- Alaska
- Arizona
- Arkansas
- California
- Colorado
- Connecticut
- Delaware
- Florida
- Georgia
- Hawaii
- Idaho
- Illinois
- Indiana
- Iowa
- Kansas
- Kentucky
- Louisiana
- Maine
- Maryland
- Massachusetts
- Michigan
- Minnesota
- Mississippi
- Missouri
- Montana
- Nebraska
- Nevada
- New Hampshire
- New Jersey
- New Mexico
- New York
- North Carolina
- North Dakota
- Ohio
- Oklahoma
- Oregon
- Pennsylvania
- Rhode Island
- South Carolina
- South Dakota
- Tennessee
- Texas
- Utah
- Vermont
- Virginia
- Washington
- West Virginia
- Wisconsin
- Wyoming
Contents |
What is a Medical Power of Attorney?
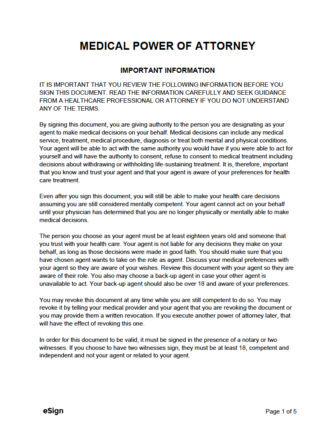
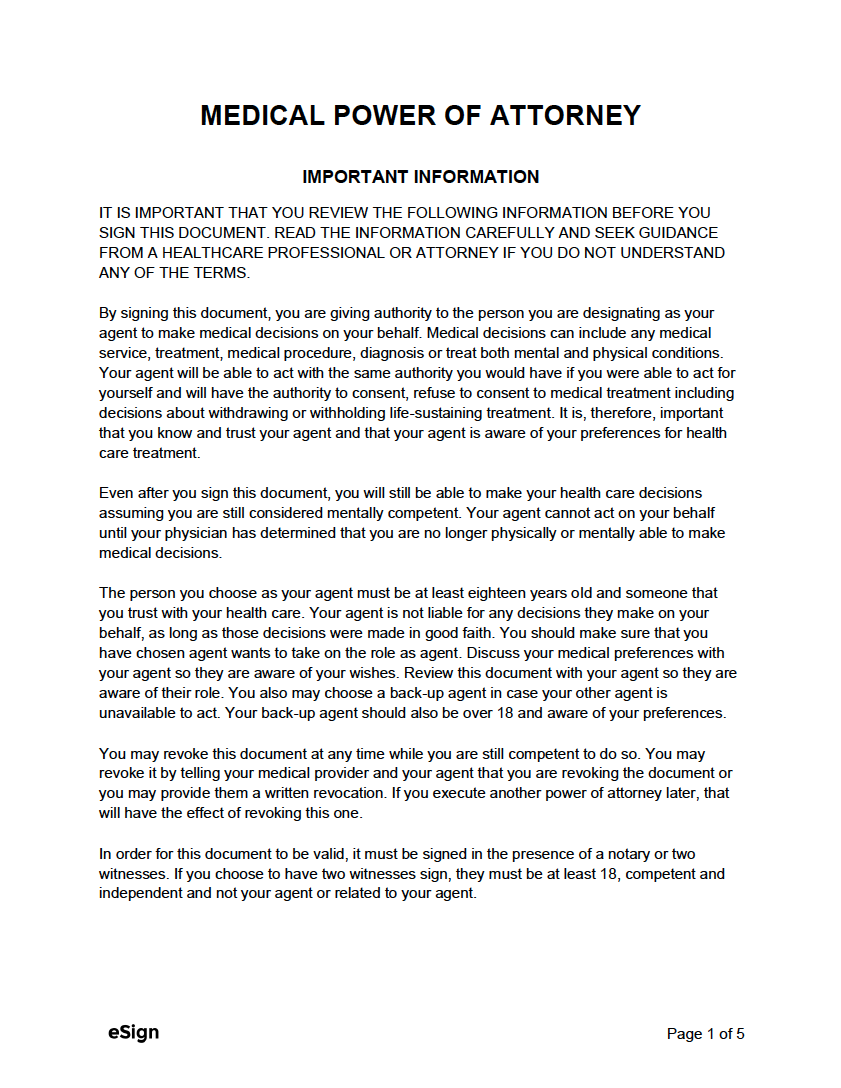
A medical power of attorney is a legal form completed by those looking to plan for end-of-life care or an unexpected health event. By completing and signing the form, the principal ensures their wishes are represented by someone they know and trust. The document only appoints a health care representative, it does not specify the types of treatment they would or would not like to receive, that is reserved for a living will form. Assigning a representative well in advance provides relief for family members by avoiding disagreements regarding tough health care decisions for a loved one who is incapacitated.
It’s important that the principal, agent, and other involved parties understand that the form only remains in effect while the principal is still alive. Once they pass away, a last will and testament (a “will”) is typically used for distributing the principal’s assets to family members.
Related Forms
- Advance Directive – A comprehensive planning form that combines a medical power of attorney and a living will.
- Living Will – Allows an individual to state how they would like to be treated, medically speaking, in the event they become incapacitated.
What Rights Does It Give?
A medical power of attorney gives the selected agent ALL RIGHTS regarding healthcare decisions. If there are certain topics or decisions the principal would like to prevent the agent from handling, they can specify these restrictions in the document. Otherwise, the agent will have full authority to communicate with healthcare staff about how to treat the principal in any given medical situation. This is why it’s important for the principal to also create a living will so their health care representative can be guided by the principal’s written instructions and wishes.
Important Terms
- Agent / Attorney-in-Fact – The person(s) that will represent the principal and make medical decisions on their behalf.
- Principal – The person that assigns the agent and executes the form.
- Incapacitation – A medical state that leaves one unable to manage their own affairs (e.g., suffering a stroke that limits speech, degenerative diseases, being in a coma).
How to Get Medical Power of Attorney
Step 1 – Select the Agent(s)
At a minimum, the principal has to nominate one (1) person as their agent. This is commonly their spouse, a family member, or a close friend. The principal is not restricted in their choice of agent, as long as the agent does not work as a healthcare provider where the principal receives treatment (a common state requirement) and is not under the age of eighteen (18). It is highly recommended that the principal nominate two (2) additional agents, known as “successor agents.” Should the primary agent be unavailable for any reason, a secondary agent can step in as the primary agent.
Step 2 – Identify the Agent’s Powers
Without adding restrictions to the POA, the attorney-in-fact would receive all-encompassing powers from the principal relating to medical matters. In other words, the agent has the right to make any decision that the principal would be able to make for themselves, were they not incapacitated. The principal can choose to add certain instructions on the document restricting the agent’s powers. This includes selecting the types of treatments and health care the principal receives, how it’s administered, and any other questions that come up along the way. The principal should complete a living will alongside the POA to ensure the agent understands important matters, such as life support and organ donation.
Step 3 – Sign the Form
Once the principal has completed all required fields (as instructed in the How To Write section), they will need to sign the form. This MUST be done in accordance with state law. The medical power of attorney statutes in most states have one (1) or both of the following requirements:
- Signed in the presence of two (2) witnesses, AND/OR
- Notarized.
If witnessed: If witnesses are required, the principal will sign the document only once they are in the presence of witnesses. Once verified, each witness will need to sign and print their name onto the form.
If notarized: If notarization is required by state law (in addition to or in replacement of witnesses), they have the option of notarizing the form in person or digitally. In-person options include local post offices, libraries, and banks (to name a few). Alternatively, the principal can have the form notarized via eSign. All they have to do is upload the form, speak with a licensed notary, sign the form while speaking with them, and pay the $25 fee.
Step 4 – Distribute
The principal should make copies of the completed POA and distribute it to their attorney, primary care physician, and anyone else whom they believe would benefit from having a copy. However, it’s important to make a note of every single person that receives a copy of the POA, as they will need to be contacted should the POA be revoked or amended at any time. The agent will need to show a copy of the POA whenever they present themselves as the principal’s representative.
Sample
Download: PDF, Word (.docx), OpenDocument
How to Write
Download: PDF, Word (.docx), OpenDocument
Color code:
- Red = Required
- Blue = Optional
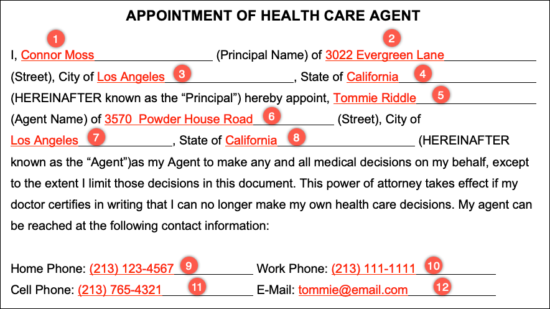
Step 1 – Principal + Agent
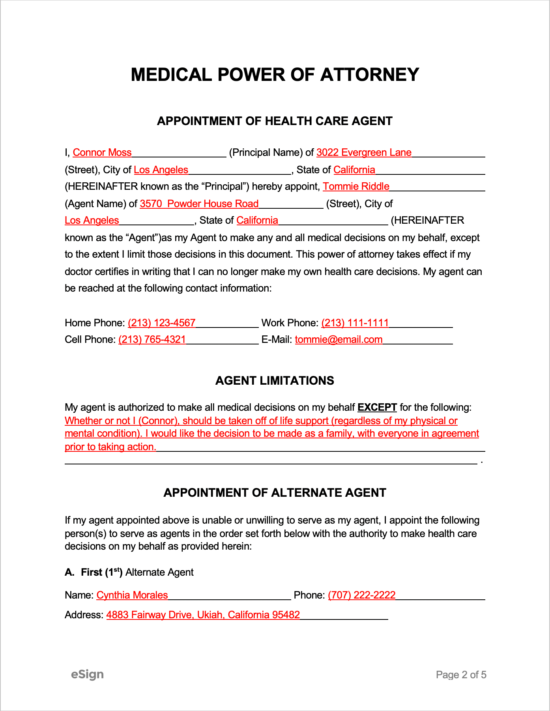
In the fields 1-5, the principal will need to enter their name, street address, city, and state. For fields 5-8, they will need to enter their agent’s full name, street address, city, and state. Fields 9-12 are for the agent’s contact information, including their home, work, and cell phone numbers, and their email address.
Step 2 – Limitations of Agent
The principal can specify certain powers and duties that the agent does not have the authority to perform. This section is optional, and can be left blank if the principal does not intend to limit their agent’s powers.
Step 3 – Alternate Agents
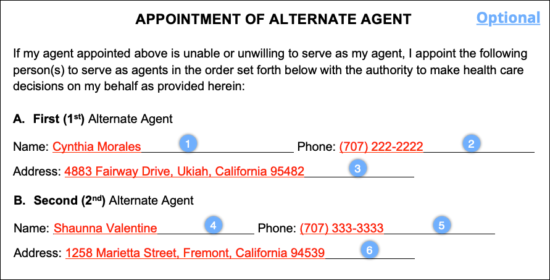
The form provides space for listing up to two (2) alternate agents. Should something happen to the main agent, the first alternate agent would assume responsibility. If the first alternate agent is unavailable or can no longer serve as agent, the second alternate agent would step in. This entire section is optional; it is not a requirement that the principal names secondary agents, however, it is highly recommended. For each alternate agent, the principal will need to provide their name, phone number, and address.
Step 4 – Original and Copies
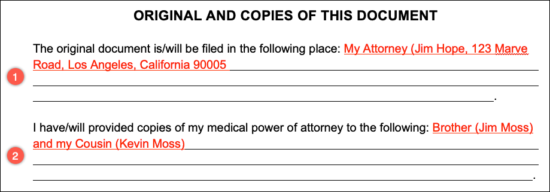
Using the first four (4) fields, enter the address/location where the original POA will be stored. If it will remain in the principal’s home, the exact location should be specified. For example, if it will be placed in an office, enter which room, desk, and drawer it can be found in.
Using the subsequent four (4) fields, specify the names of ALL individuals and entities that will be given a copy of the POA. It is very important this section is completed, as the principal would need to reach out to everyone that received a copy if they revoke the form.
Step 5 – Duration
The “Duration” section of the POA document is optional. If the principal wants to make the POA automatically terminate on a certain date, they will need to provide the following:
- Inscribe their initials AND check the box; and
- Enter the date (day, month, and year) on which the power of attorney will expire.
Step 6 – Signing
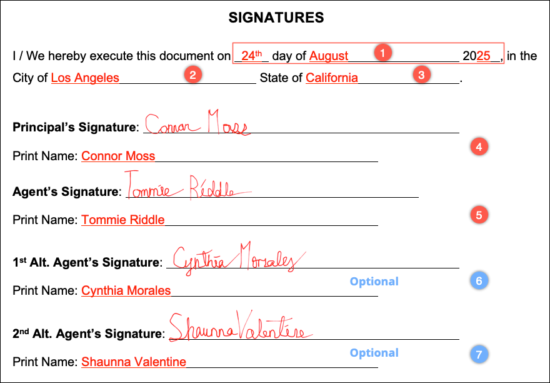
Because the signing process is dependent on the requirements of the state in which the principal resides, the list of signing requirements should be referenced. The principal will need to have the form notarized or signed by two (2) witnesses. On the fourth (4th) page, the parties will need to provide the following information:
- Date on which the form is being signed.
- Name of the city in which the principal is signing.
- State of signing.
- Signature of the principal (can be signed by hand or through eSign) and their printed name;
- Signature and printed name of the agent;
- Signature and printed name of the 1st alternate agent (if applicable); and
- Signature and printed name of the 2nd alternate agent (if applicable).
If witnesses observed the principal’s signature, they will both need to sign their name, write their printed name, enter the date they signed, and provide their full address. If the document was signed in the presence of a Notary Public, the notary will know which fields to complete (do NOT write anything in the “Notary Acknowledgment” area).
